SAFE Stack v3 with SSDT Starter
Looking to create an F# powered React app using the new SAFE Stack v3, SQL Server and the new SSDT F# Type Provider? Then you’re in luck! This post will provide a step-by-step tutorial to get you up and running.
In this post we will cover the following:
- Creating a Fable 3 powered web site using the latest SAFE Stack template
- Creating a SQL Server database using Azure Data Studio
- Adding a .sqlproj to your SAFE Stack solution using the SQL Database Projects extension in Azure Data Studio
- Creating a data module in your SAFE Stack application using the new SSDT Type Provider in the SQLProvider library.
To get started, you will need the following:
- .NET 5 CLI
- Visual Studio Code
- Extension: Ionide
- Azure Data Studio
- Extension: SQL Database Projects
The Stack
For the last two years, I have maintained a greenfield web app that is essentially a SAFE Stack app; it has been a joyful experience! My daily driver has been Visual Studio Professional which I have developed with since .NET v1.1. I chose to write this post around VSCode + Ionide + Azure Data Studio because it is a cross platform stack, and I want to accommodate the many F# devs that are coming over from other backgrounds and other platforms. So this post was a learning experience for me as well!
But I do want to add that VS2019 Community Edition and above has built-in SSDT .sqlproj support via the “SQL Server Data Tools” extension (available as an option in the VS installer).
Installing the SAFE Stack Template
Fable 3 was recently released boasting new features, faster compile times, and a cool new way to launch as a dotnet tool. While Fable 3 does have its own starter template, it only covers the front end. The SAFE Stack takes that and adds:
- A backend web API powered by ASP.NET and Giraffe
- A middle tier Shared project for entity models
- RPC-style communication via Fable.Remoting
- A webpack config that wires up many useful web development options
- A FAKE powered build project that automates running and deploying your app
The new SAFE Stack v3 (currently in beta) supports Fable 3 and is available on NuGet.
https://www.nuget.org/packages/SAFE.Template/
Clicking on the link to the latest v3 link should give you the “.NET CLI” install command: As of now, it is:
dotnet new --install SAFE.Template::3.0.1

Assuming you have already installed the .NET 5 CLI, run the command to install the template.
Creating a SAFE Stack App
1) Run the new “SAFE” template.
dotnet new SAFE -o SafeTodo--owill create a “SafeTodo” subfolder with a “SafeTodo.sln” solution filecd SafeTodo- change to the new “SafeTodo” directory
2) Restore the command line tools that we will use to build and run our SAFE Stack application:
dotnet tool restore- this should install “paket”, which is like NuGet but with some additional features, and the “fable” transpiler
3) Restore NuGet dependencies:
dotnet restore SafeTodo.sln
4) OPTIONAL - Initialize a local git repository (the SAFE Stack already includes a .gitignore file!):
git init
Now we can open our new app in Visual Studio Code:
code .- opens Visual Studio Code to the current folder.
NOTE: If you haven’t already installed the Ionide extension in Visual Studio Code, you should see a prompt in the bottom right corner to install the Recommended Extensions (which is Ionide). Do that.
Assuming Ionide is installed, you should now see an Ionide tab that displays a “SOLUTION EXPLORER” panel on the left with a “src” folder with your three SAFE Stack F# projects:
- Shared.fsproj
- Server.fsproj
- Client.fsproj
Running the SAFE Stack App
- Open a new Terminal in Visual Studio Code
dotnet run
That’s it! Entering dotnet run from the SafeTodo root folder will run the “Build.fsproj” project which contains FAKE build script tasks that will do the following automatically:
- Install NPM dependencies (React, and other js libraries) if they are not yet installed
- Start the Server component (the Giraffe Web API) in watch mode
- Start the Client component (the Fable.React front end) in watch mode
You should be able to view the site in your browser using the port given after the build completes: http://localhost:8080/ NOTE: The current SAFE Stack beta template displays http://0.0.0.0:8080, but I replaced that with http://localhost:8080.
Creating a “SafeTodo” Database with Azure Data Studio
Connecting to a SQL Server Instance
1) In the “Connections” tab, click the “New Connection” button

2) Enter your connection details, leaving the “Database” dropdown set to <Default>.

Creating a new “SafeTodo” Database
- Right click your server and choose “New Query”
- Execute this script:
USE master
GO
IF NOT EXISTS (
 SELECT name
 FROM sys.databases
 WHERE name = N'SafeTodo'
)
 CREATE DATABASE [SafeTodo];
GO
IF SERVERPROPERTY('ProductVersion') > '12'
 ALTER DATABASE [SafeTodo] SET QUERY_STORE=ON;
GO
- Right click the “Databases” folder and choose “Refresh” to see the new database.
NOTE: Alternatively, if you don’t want to manually create the new database, you can install the “New Database” extension in Azure Data Studio which gives you a “New Database” option when right clicking the “Databases” folder.
Create a “Todos” Table
CREATE TABLE [dbo].[Todos]
(
  [Id] UNIQUEIDENTIFIER NOT NULL PRIMARY KEY,
  [Description] NVARCHAR(500) NOT NULL,
  [IsDone] BIT NOT NULL
)
Creating an SSDT Project (.sqlproj)
At this point, you should have a SAFE Stack solution and a minimal “SafeTodo” SQL Server database with a “Todos” table. Next, we will use Azure Data Studio with the “SQL Database Projects” extension to create a new SSDT (SQL Server Data Tools) .sqlproj that will live in our SAFE Stack .sln.
1) Install the “SQL Database Projects” extension.
2) Right click the SafeTodo database and choose “Create Project From Database” (this option is added by the “SQL Database Projects” extension)

3) Configure a path within your SAFE Stack solution folder and a project name and then click “Create”. NOTE: If you choose to create an “ssdt” subfolder as I did, you will need to manually create this subfolder first.

4) You should now be able to view your SQL Project by clicking the “Projects” tab in Azure Data Studio.

5) Finally, right click the SafeTodoDB project and select “Build”. This will create a .dacpac file which we will use in the next step.
Create a TodoRepository Using the new SSDT provider in SQLProvider
Installing SQLProvider from NuGet
Switching back to VSCode, we will install SQLProvider and System.Data.SqlClient to the Server project:
- Open a new terminal
- From the “SafeTodo” root folder:
dotnet paket add SQLProvider -p Server - From the “SafeTodo” root folder:
dotnet paket add System.Data.SqlClient -p Server
Initialize Type Provider
Next, we will wire up our type provider to generate database types based on the compiled .dacpac file.
1) In the Server project, create a new file, Database.fs. (this should be above Server.fs).
module Database
open FSharp.Data.Sql

[<Literal>]
let SsdtPath = __SOURCE_DIRECTORY__ + @"/../../ssdt/SafeTodoDB/bin/Debug/SafeTodoDB.dacpac"

// TO RELOAD SCHEMA: 1) uncomment the line below; 2) save; 3) recomment; 4) save again and wait.
//DB.GetDataContext().``Design Time Commands``.ClearDatabaseSchemaCache

type DB =
    SqlDataProvider<
        Common.DatabaseProviderTypes.MSSQLSERVER_SSDT,
        SsdtPath = SsdtPath,
        UseOptionTypes = true
    >

let createContext (connectionString: string) =
    DB.GetDataContext(connectionString)
2) Create TodoRepository.fs below Database.fs.
module TodoRepository
open FSharp.Data.Sql
open Database
open Shared

/// Get all todos that have not been marked as "done".
let getTodos (db: DB.dataContext) =
    query {
        for todo in db.Dbo.Todos do
        where (not todo.IsDone)
        select
            { Shared.Todo.Id = todo.Id
              Shared.Todo.Description = todo.Description }
    }
    |> List.executeQueryAsync

let addTodo (db: DB.dataContext) (todo: Shared.Todo) =
    async {
        let t = db.Dbo.Todos.Create()
        t.Id <- todo.Id
        t.Description <- todo.Description
        t.IsDone <- false

        do! db.SubmitUpdatesAsync()
    }
3) Create TodoController.fs below TodoRepository.fs.
module TodoController
open Database
open Shared

let getTodos (db: DB.dataContext) =
    TodoRepository.getTodos db

let addTodo (db: DB.dataContext) (todo: Todo) =
    async {
        if Todo.isValid todo.Description then
            do! TodoRepository.addTodo db todo
            return todo
        else
            return failwith "Invalid todo"
    }
4) Finally, replace the stubbed todosApi implementation in Server.fs with our type provided implementation.
module Server

open Fable.Remoting.Server
open Fable.Remoting.Giraffe
open Saturn
open System
open Shared
open Microsoft.AspNetCore.Http

let todosApi =
    let db = Database.createContext @"Data Source=.\SQLEXPRESS;Initial Catalog=SafeTodo;Integrated Security=SSPI;"
    { getTodos = fun () -> TodoController.getTodos db
      addTodo = TodoController.addTodo db }

let fableRemotingErrorHandler (ex: Exception) (ri: RouteInfo<HttpContext>) =
    printfn "ERROR: %s" ex.Message
    Propagate ex.Message

let webApp =
    Remoting.createApi()
    |> Remoting.withRouteBuilder Route.builder
    |> Remoting.fromValue todosApi
    |> Remoting.withErrorHandler fableRemotingErrorHandler
    |> Remoting.buildHttpHandler

let app =
    application {
        url "http://0.0.0.0:8085"
        use_router webApp
        memory_cache
        use_static "public"
        use_gzip
    }

run app
Run the App!
From the VS Code terminal in the SafeTodo folder, launch the app (server and client):
dotnet run
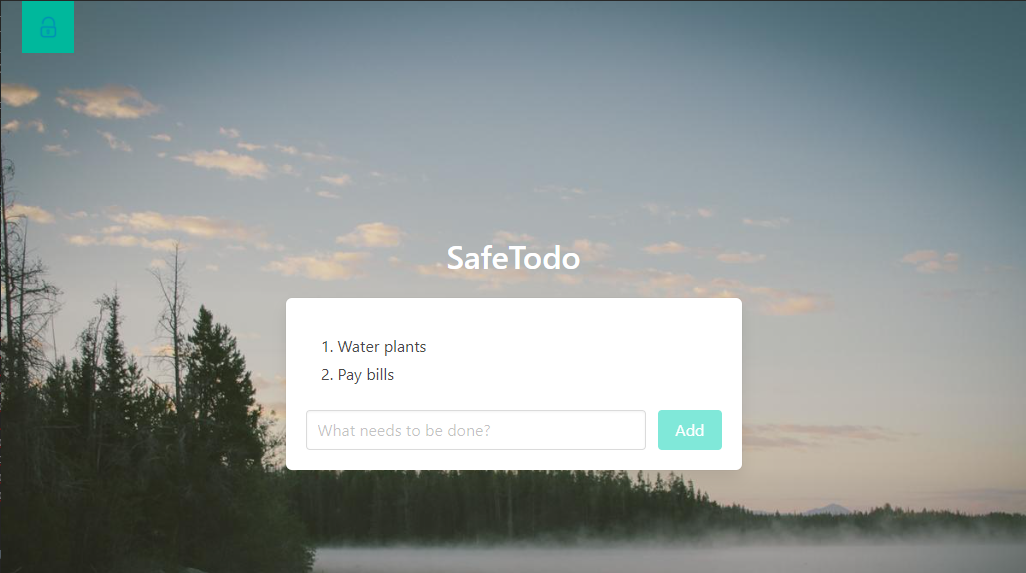
You should now be able to add todos.
Adding a “Done” Feature
Now that we can add and view todos, we need a way to mark them as complete.
First, we need to modifiy the Shared.Todo entity to have an IsDone property.
type Todo =
    { Id : Guid
      Description : string
      IsDone : bool }

module Todo =
    let isValid (description: string) =
        String.IsNullOrWhiteSpace description |> not

    let create (description: string) =
        { Id = Guid.NewGuid()
          Description = description
          IsDone = false }
Now we need to fix the getTodos function so that it loads the new IsDone field. While we’re at it, since we now have an IsDone field, let’s change it so that it returns all todos; that way, we can render the completed todos differently in the UI.
/// Get all todos (regardless of IsDone status)
let getTodos (db: DB.dataContext) =
    query {
        for todo in db.Dbo.Todos do
        select
            { Shared.Todo.Id = todo.Id
              Shared.Todo.Description = todo.Description
              Shared.Todo.IsDone = todo.IsDone }
    }
    |> List.executeQueryAsync
Next we will add an updateTodo function to the TodoRepository:
let updateTodo (db: DB.dataContext) (todo: Shared.Todo) =
    async {
        let! existingTodo =
            query {
                for t in db.Dbo.Todos do
                where (t.Id = todo.Id)
                select t
            }
            |> Seq.tryHeadAsync

        // Fail if this unexpected scenario occurs
        let existingTodo = existingTodo |> Option.defaultWith (fun () -> failwith "Update failed; Todo was deleted!")

        existingTodo.Description <- todo.Description
        existingTodo.IsDone <- todo.IsDone

        do! db.SubmitUpdatesAsync()
        return todo
    }
Moving our way up the stack, now we need to add a new updateTodo handler on the Shared.ITodosAp:
type ITodosApi =
    { getTodos : unit -> Async<Todo list>
      addTodo : Todo -> Async<Todo>
      updateTodo : Todo -> Async<Todo> }
Then we need to add it to the TodoController::
let updateTodo (db: DB.dataContext) (todo: Todo) =
    async {
        if Todo.isValid todo.Description
        then return! TodoRepository.updateTodo db todo
        else return failwith "Invalid todo"
    }
And we need to fix the now broken todosApi implementation in Server.fs:
let todosApi =
    let db = Database.createContext @"Data Source=.\SQLEXPRESS;Initial Catalog=SafeTodo;Integrated Security=SSPI;"
    { getTodos = fun () -> TodoController.getTodos db
      addTodo = TodoController.addTodo db
      updateTodo = TodoController.updateTodo db }
NOTE: We are using a shorthand way of setting the updateTodo field by partially applying the TodoController.getTodos function with the db dependency argument; however, you can also write it out this way if you prefer:
updateTodo = fun todo -> TodoController.updateTodo db todo
Now for the UI! Let’s make it so that clicking a todo will
- Toggle the IsDone field
- Send it to the new
updateTodofunction on the Fable.Remoting API - Update the model after the todo has been updated on the server
For this, we will need
- A new Msg handler,
ToggleIsDone - Another Msg handler,
UpdatedTodo(that will be triggered after the async response is received)
type Msg =
    | GotTodos of Todo list
    | SetInput of string
    | AddTodo
    | AddedTodo of Todo
    | ToggleIsDone of Todo
    | UpdatedTodo of Todo
Then we will implement these handlers in the update function:
    | ToggleIsDone todo ->
        let toggled = { todo with IsDone = not todo.IsDone }
        model, Cmd.OfAsync.perform todosApi.updateTodo toggled UpdatedTodo
    | UpdatedTodo todo ->
        { model with
            Todos =
                model.Todos
                |> List.map (fun t ->
                    if t.Id = todo.Id then todo else t
                )
        }, Cmd.none
Now for rendering the todos, we want to
- Conditionally show todos with
IsDone = truewith a line-through style - Add a “pointer” cursor style when hovering over todos to indicate that they are clickable
- Add an “onClick” event handler when clicking a todo that will dispatch our new
ToggleIsDonemessage
                for todo in model.Todos do
                    Html.li [
                        prop.onClick (fun e -> dispatch (ToggleIsDone todo))
                        prop.text todo.Description
                        prop.style [
                            if todo.IsDone then style.textDecoration textDecorationLine.lineThrough
                            style.cursor "pointer"
                        ]
                    ]
Debugging
SAFE Stack v2 allowed you to debug both the client and server via VSCode out-of-the-box. However, SAFE Stack v3 is currently in beta, so the configuration required to do this is not yet ready. We can still debug the server, but to do so, we need to manually launch the server and client separately.
Launch the Server in Debug Mode
- Hover over the Server project in Ionide will display a “Debug” button. Click this to start the Server in debug mode.
- After the server starts, you will be able to add debug breakpoints
Launch the Client Manually
- From a terminal window in the SafeTodo root directory, manually start Fable in watch mode:
fable watch src/Client --run webpack-dev-server
NOTE: You can debug the transpiled JavaScript for the client via the browser’s developer window.
Deployment
When creating a Release build for deployment, it is important to note that SQLProvider SSDT expects that the .dacpac file will be copied to the deployed Server project bin folder.
Here are the steps to accomplish this:
- Modify your Server.fsproj to include the .dacpac file with “CopyToOutputDirectory” to ensure that the .dacpac file will always exist in the Server project bin folder.
<ItemGroup>
    <None Include="..\{relative path to SSDT project}\ssdt\SafeTodo\bin\$(Configuration)\SafeTodoDB.dacpac" Link="SafeTodoDB.dacpac">
        <CopyToOutputDirectory>PreserveNewest</CopyToOutputDirectory>
    </None>

    { other files... }
</ItemGroup>
- In your Server.Database.fs file, you should also modify the SsdtPath binding so that it can build the project in either Debug or Release mode:
[<Literal>]
#if DEBUG
      let SsdtPath = __SOURCE_DIRECTORY__ + @"/../../ssdt/SafeTodoDB/bin/Debug/SafeTodoDB.dacpac"
#else
      let SsdtPath = __SOURCE_DIRECTORY__ + @"/../../ssdt/SafeTodoDB/bin/Release/SafeTodoDB.dacpac"
#endif
- This assumes that your SSDT .sqlproj will be built in Release mode. (You can build it manually, but I usually employee a FAKE build script to handle this.)
Wrapping Up
If all things went well, you should now have a working SAFE Stack v3 app with a full data layer using the new SQLProvider SSDT type provider!

The companion code for this tutorial is posted on my GitHub account here. Feel free to post any issues you encounter or just to leave a comment. Or hit me up on Twitter!